Jim Beam Distillery Tour – Part 3
Contributed by on May 18, 2016
One reader loves this post.

Before getting into what it takes to put together a bottle of Booker’s Rye I feel compelled to make the obvious point that this isn’t part of the typical Jim Beam Distillery tour. If you stop by Claremont for a visit, they’re not going to put you to work putting together some bottles of whiskey.
This entire experience I’m about to share, because some of you might find it interesting, is from a press event and after some of the feedback I’ve gotten from parts 1 & 2 along with the product reviews I feel like it was necessary to expressly mention this at the beginning. With that caveat in mind, I hope you enjoy seeing what it takes to get a bottle of Booker’s out the door.

After our lunch at the Knob Creek house we were brought back to the bottling hall where a pallet of Booker’s Rye bottles were waiting for us to put on the finishing touches. To show us the ropes Master Distiller Fred Noe, Booker’s son, walked us through the steps from beginning to end under the watchful eye of some of the distillery workers who do this every day. He carefully numbered, medallioned, tabbed, waxed and boxed the very first officially bottle of Booker’s Rye while we watched.
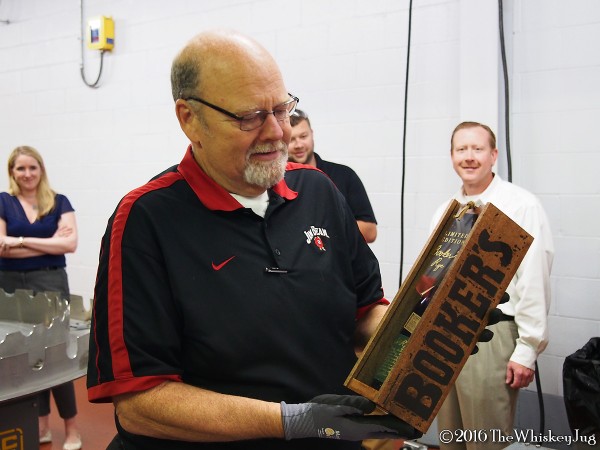
Upon completion Fred held the box up for a photo-op and he looked both happy and wistful. You didn’t have to be a world-class empath to see that this release, one of the last experiments his dad laid down before his passing, meant a lot to him. There was no shortage of pressure on us to not screw up any of these bottles.
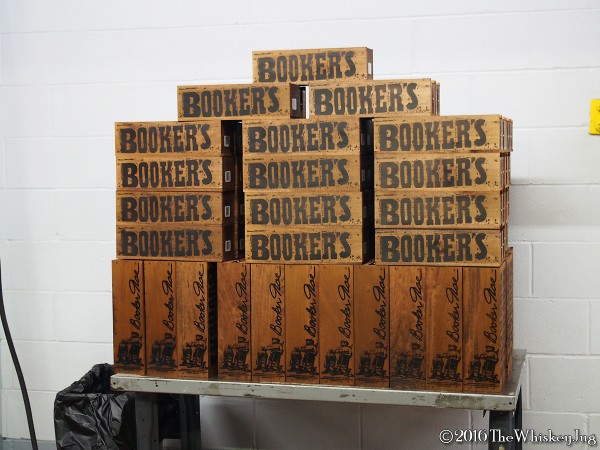
With the first bottle completed, and the legend himself watching our every move, we looked over at the pile of Booker’s Rye boxes stacked on the table next to the boxing station. We had our work cut out for us so we broke into four groups of two. Each group would be responsible for putting together 24 bottles and in case you’re bad at math that’s 12 bottles per person and 96 in total.

The process started with one of the distillery workers pulling 24 bottles out of 4 cases and lining them up on the table. I guess they didn’t want us to drop any so they assumed the responsibility of this step, but after that we were on our own. Once on the table the boxes were taken over to the boxing table to be filled back up once completed. As you can see they had already done all of the filling and labeling beforehand, but the bottle number was blank and that was our first task; there are now 12 bottles (49-60) that bear my scribbling.

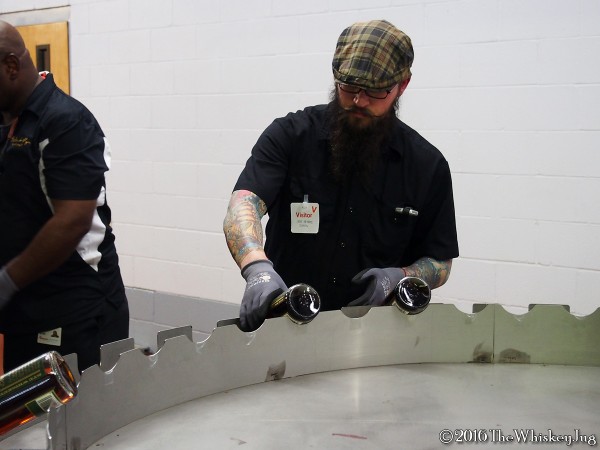
Next up was putting on the medallion. If you look up at the second image you’ll see a bottle of Booker’s Rye butted up against a metal plate connected to an adjustable mechanism. The front of that plate has a black line straight down the middle and that line needs to line up between the E and the R in Booker’s. Once lined up we peeled off one of the Booker’s medallions pictured above, touch the top of it to the bottom of that plate, centered it and then stuck it on.

Now that our bottle had a number and a medallion it was time to get a tab put on them. We took long, fibrous, stickers and wrapped them around the neck just below the cap. To make the pull tab we left a little under 1/2 an inch sticking out and that was bent back so it would stick out at a 90 degree angle. At this point the bottles looked exactly like the picture above.

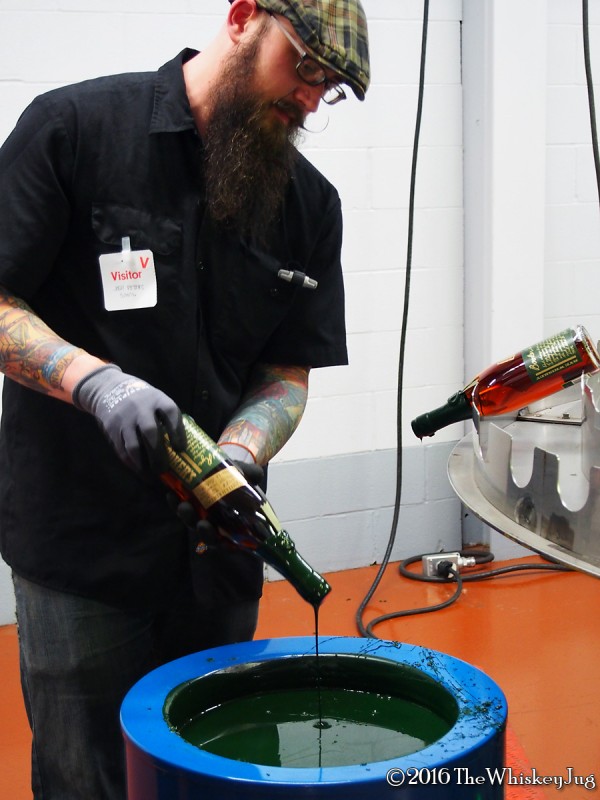
From there it was on to the waxing. To properly wax a bottle of Booker’s Rye (or any other Booker’s for that matter) enter the wax as vertical as possible and dip down to just below the medallion where the ribbons start and then come back out the same way. Once out of the wax a sharp angle needs to be applied to the bottle so the excess wax can drip off. Be sure the tab is pointing down so that the dripping wax can run off of it. This ensures a good seal and and easy-grip pull tab.
Once the dripping has slowed the bottles are put on this rotating table that angles the bottles down so that any remaining wax can drip off onto the cardboard laid out on the floor around the table. This table spins for about 3 seconds and then stops for about 3 seconds, then spins for 3 and stops for three and so on. This brief pause is when you can place your bottle in the perfectly measured slots but you have to be both quick and careful.

If you time it wrong you’ll mess up your wax work and have to cut it off and do it again. If you time it right and everything goes well your bottle goes on this start-and-stop carousel ride. After about a rotation and a half the wax has hardened enough that it can be boxed.

Inside of each expertly crafted Booker’s box is a tiny dab of plasticky glue so you only get one shot at centering the Booker’s in the box. Some folks laid the boxes down and gently laid the bottle down from bottom to top. I went for a vertical approach and carefully slid the bottle in standing up. Both methods seemed to work.
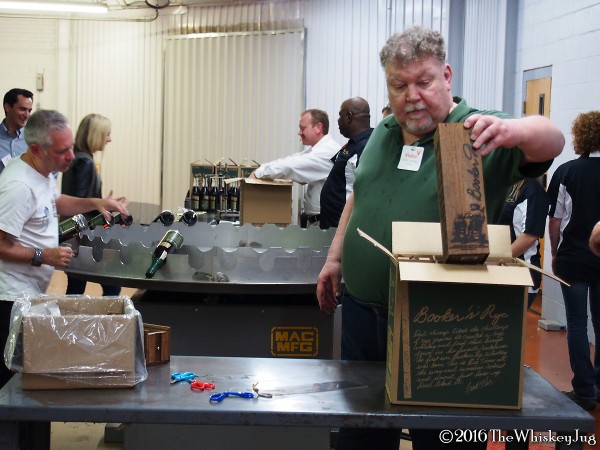
After carefully getting them centered in their boxes we slid the windows in place, looped the leather over the screw and were 97% done. The final step was the easiest step and that was putting them in the cases in numerical order. Once a case was filled a distillery worker then took the case and put it on a pallet.

It was easy to see where their risk analysis of having us do the work netted out. They got them on the table at the beginning and and off the table at the end, making sure we didn’t drop them in between which I’m grateful for because I’m sure if I had dropped one, or even worse a whole case, I wouldn’t have been given the opportunity to partake in the next portion of the day’s activities. Bottling our own.
Now that we’d each practiced on 12 bottles we were given our own bottle to do the entire process with from beginning to end. I took the first one, numbered it 0097, and repeated the process all the way through to the point of sticking it into a personalized box after Fred signed it. How freaking cool is that? I know I already gave my preliminary notes of the Booker’s Rye, but you can expect a full deep dive once the bottle arrives. That’s right, I’m opening it, drinking it and sharing it. After all, that’s what whiskey is for!

I hope you enjoyed this tour of the Jim Beam Distillery. I tried to pepper in as much info about the distillery as I could so I also hope you discovered something new. If not, then I hope you were at least entertained. It was exciting to be a part of the Booker’s Rye launch and I want to thank Jim Beam for allowing this little ol’ whiskey blogger join them and see what goes into making the stuff I love to drink. Until the next one… cheers!
Jim Beam Distillery Tour – Part 1
Jim Beam Distillery Tour – Part 2

The post Jim Beam Distillery Tour – Part 3 appeared first on The Whiskey Jug.