Nick Drinks Labs: Quadshaker
Contributed by on Nov 21, 2013
Three readers love this post.
We’ve all had a beer flights and wine flights but have you ever had a cocktail flight? A few exist out there but rarely will you see a set of cocktails made “a la minute” for a patron. Why? It’s a lot of work and makes a bunch of tins dirty. I wanted to make that happened and have been experimenting with the process.
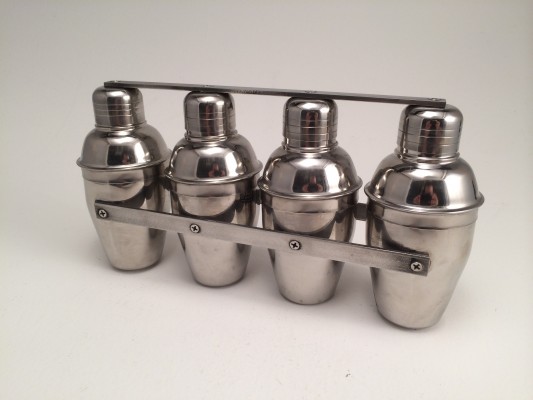
Here is my second prototype, the Quadshaker. Side Note: If you’ve been to Sugar House in Detroit, you might have seen Yani shake with 3 tins (he claims he can do four). The code name of this project was Yani Plus One that is until we have proof.
The device contains four 6 oz tins I bought from BarProducts.com. I strapped them all together with stainless steel bars. You will need to seek out a specialty store to get the steel but you could certainly use aluminum which most hardware stores carry. It will also be easier to work with but won’t match the finish of the stainless steel tins.
Here are the steps to make your own. We are testing out a Boston Style version next so stay tuned on that. This one does leak a tiny bit.

This isn’t that tricky of a project. Some big power tools help but you can do it with hand tools too. I did both ways (I made two) and documented the power tools process. It does take more time, especially drilling the holes but the results are similar. You will need the above items:
- Scrap of wood at least 12″ long by 4″ wide by 3/4″ deep.
- Four 6 oz shakers – (Bar Products)
- Hammer
- Polyurethane (spray or brush)
- Countersink for metal
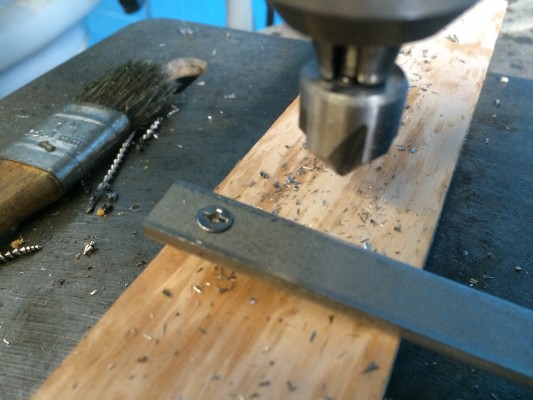
- 2″ Forstner Bit
- #25 Drill bit for metal (more than one, if you use a hand drill. Much easier on a drill press)
- Food Grade Silicone
- Philips Screwdriver
- 5/16″ Wrench
- Stainless Washers (#6)
- Stainless Bolts (6-32, 1/2″)
- Stainless Nuts (Locking 6-32)
- Chip Brush (old paint brush)
- Stainless (or aluminum) bar stock 1/8″ x 3/4″ x 30″
Additional Tools
- Hacksaw or Bandsaw
- Drill or Drill Press
- Center Punch
- Center Drill – Smaller than drill bit
- Deburing Tool
- Buffing Wheel
- Buffing Compound
- Rags
- Cutting Fluid
- Vice
- Sharpie
- Sand paper

Step One) Cut your bar stock to size (9 3/8″). This can be done with a hacksaw or band saw. You will need three pieces the same size.

Step Two) Layout your holes & center punch them. Repeat these steps on all three metal bars. Mark 1/4″ & 3 1/8″ on each side so there are four holes total.
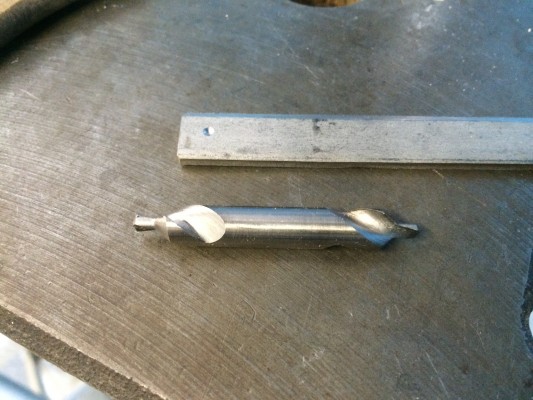
Step Three) Using a center drill, start all the holes (12). Don’t drill two far or you will add the shoulder. Switch to your drill bit and finish the hole.
Step Four) Counter sink all the holes. Test the depth with a bolt.

Step Five) There is a small depression on the inside of the shaker tin lids. Drill a hole on each of those.

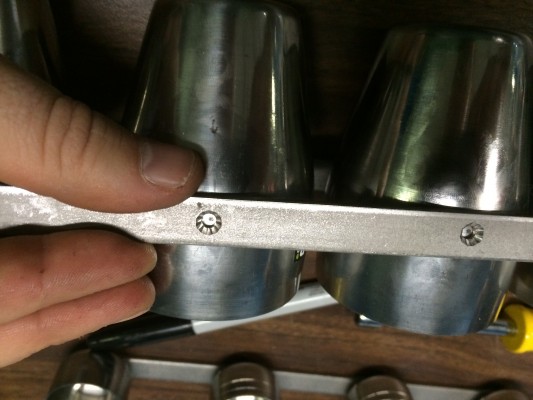
Step Six) Using one of your bars, attach each of the shaker tin lids with a dab of silicone, a nut and a washer. Tighten with the wrench & screw driver.
Step Seven) Attach all three pieces together so the top bar holds everything together. Use one of the bars to mark the holes on the tins on both sides.

Step Eight) Take off the top bar and place the tins & strainer into a vice. Center punch and drill the holes. Be careful not to drill too larger. Starting with a smaller bit would be a better idea.
Step Nine) Assemble everything using silicone, nuts and washers.
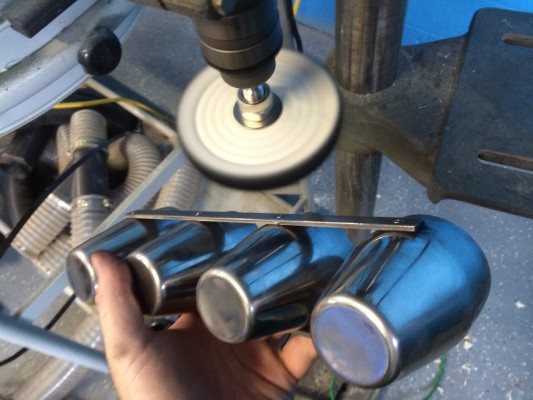
Step Ten) Optionally, you can shine the stainless steel with some buffing compound and a buffing wheel. This one fits right in a drill press.

Step Eleven) Remove the bottom assembly so it is just the strainer and top connected with a bar. Trace an outline on your wood piece. Add a center to each circle.

Step Twelve) Using your Forstner bit, drill shallow holes within each circle. Sand the piece and coat in one or more applications of Polyurethane.

Here are some pictures of the final project. I’m not a great machinist so it’s not super precise but it’s good enough.

The wood piece is used to hold your cocktail glasses in place for pouring. It also makes a great platform to serve the cocktail flight. Obviously this isn’t a perfect tutorial but it will give you a rough idea of what went into it. If you try the project yourself, let me know.
Budmo!